The text file operation, find text file, search the sandbox’s Documents folder for text file names that match a search term. If the operation found any results, the app put them in an array variable. At this point, you can do what ever you like with the array. For example, you can dump its elements in the console or a table view.
| Code presented on this page assume you are using Xcode 7.0 and Swift version 2.0. So if you are using a older or newer version of Swift, it may produce errors. Fix them by using Xcode’s Fix-it tool. Also, I assume you aren’t a newbie to the Swift Programming Language and you know your way around Xcode Integrated Development Editor. |
Here’s a QuickTime movie of the find text file operation in action
Here is a User Interaction table of the find text file operation.
| User Action | App Response |
| The user initiate the find file operation by typing characters in the Search Bar | The app respond by doing the following:
|
Add a Search Bar on The File List Scene
In order to implement the find text file operation in you have to modify the storyboard’s File List View Controller scene. Start by replacing the Label with a Search Bar and tick the Shows Cancel Button checkbox in the Attributes inspector. Next, connect the Search Bar’s delegate outlet to the scene’s File View Controller object. The storyboard should look like this now:

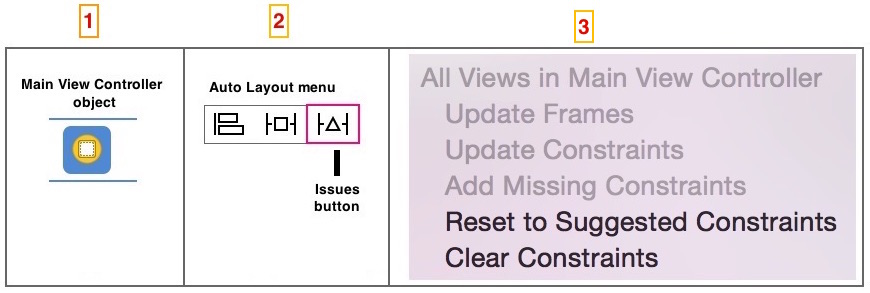
Now, select the scene’s object and use the Auto Layout menu’s Issues button to Clear Constraints and Add Missing constraints.

Modify the top section of the FileListViewController class to look like this:
class FileListViewController: UIViewController, UITableViewDataSource, UITableViewDelegate, UISearchBarDelegate {
    @IBOutlet weak var tableView: UITableView!
    @IBOutlet weak var searchBar: UISearchBar!
    let File = TextFileManager()
    var fileList = [String]() // The tableView's dataSource
    var searchResultsList = [String]()
Return to the storyboard and connect the Search Bar to the IBOutlet property you declared on line 03 above.
Here’s the code to implement the find a tex file operation in the TextFilesViewController.swift class file, cancel the search operation when the user tap the Search Bar’s Cancel operation, and dismiss the keyboard, when the view’s background is touched.
func searchBar(searchBar: UISearchBar, textDidChange searchText: String) {
    if searchText.isEmpty == false {
        searchResultsList.removeAll(keepCapacity: false)
        let predicate : NSPredicate = NSPredicate(format: "SELF contains [cd] %@", searchBar.text!)
        let resultsArray = fileList.filter {predicate.evaluateWithObject($0)}

        if resultsArray.count > 0 {
            for file in resultsArray {
                searchResultsList.append(file)
            }
            fileList.removeAll()
            fileList = searchResultsList
            tableView.reloadData()
        }
    } else {
        fileList.removeAll()
        fileList = File.readDocumentsDir()
        tableView.reloadData()
    }
}

func searchBarCancelButtonClicked(searchBar: UISearchBar) {
    searchBar.text = nil
    searchBar.resignFirstResponder()
    searchResultsList.removeAll()
    fileList.removeAll()
    fileList = File.readDocumentsDir()
    tableView.reloadData()
}

override func touchesBegan(touches: Set<UITouch>, withEvent event: UIEvent?) {
    searchBar.resignFirstResponder()
}
Go ahead and test the find text file operation. It should work as shown in the QuickTime movie presented at the beginning of this post.
![]() That’s all for today. Next week, you will implement the, subfolder operations, in the NiftyTextFile project. Until then, comments are welcomed. 🙂
That’s all for today. Next week, you will implement the, subfolder operations, in the NiftyTextFile project. Until then, comments are welcomed. 🙂
