
This is the first part of the tutorial. Before you begin, make sure you have these items:
✓ Xcode 5
✓ iOS 7 or higher
Enroll in the iOS Developer Program
The first thing you have to do is enroll in the iOS Developer program as an individual. Currently the enrollment fee is $99 and is valid for a year. Once you’ve successfully enrolled in the iOS Developer Program, you will be able to do things like:
- run your app on a your iPhone or iPad device
- publish your app on the App Store
- test features of your app you couldn’t test on the iOS Simulator; for example, take a photo
- enabling and using these Apple services in your app


Assuming you will be enrolling in the iOS Developer program as an individual, you need the following:
✓ Your legal name. It will appear as “Seller” in the App Store
✓ Your contact information
✓ A valid credit card for paying the $99 enrollment fee
![]() Go to http://developer.apple.com/programs/ios/ and click Enroll Now.
Go to http://developer.apple.com/programs/ios/ and click Enroll Now.

![]() A new page appears with an overview of the process of enrolling in the App Developer Program. Click Continue.
A new page appears with an overview of the process of enrolling in the App Developer Program. Click Continue.

![]() A screen appears with the option to sign in or create a new Apple ID. Assuming you already have an Apple ID, click Continue.
A screen appears with the option to sign in or create a new Apple ID. Assuming you already have an Apple ID, click Continue.

![]() A screen appears with the option to enroll as an Individual or as Company. Click Individual.
A screen appears with the option to enroll as an Individual or as Company. Click Individual.

![]() A screen appears with three Developer programs you can join. Select the iOS Developer Program then click Continue.
A screen appears with three Developer programs you can join. Select the iOS Developer Program then click Continue.
![]() Continue through the enrollment process and eventually you will be accepted in the iOS Developer Program.
Continue through the enrollment process and eventually you will be accepted in the iOS Developer Program.
Sign in to the iOS Dev Center and iTunes Connect
Once you’ve successfully enrolled in the iOS Developer program, you have access to the iOS Dev mber center and iTunes Connect member center. From now on, I will reference the iOS Dev member center as the Provisioning Portal and the iTunes Connect member center as the iTunes Connect Portal.
![]() Now, to access the Provisioning Portal enter this address (https://developer.apple.com/devcenter/ios/index.action) in your browser then click the Sign in link. You will see this screen in your browser.
Now, to access the Provisioning Portal enter this address (https://developer.apple.com/devcenter/ios/index.action) in your browser then click the Sign in link. You will see this screen in your browser.

![]() Enter your Apple ID and password and click Sign in, and this screen will appear in your browser. Now is a good time to bookmark it.
Enter your Apple ID and password and click Sign in, and this screen will appear in your browser. Now is a good time to bookmark it.
https://developer.apple.com/devcenter/ios/index.action

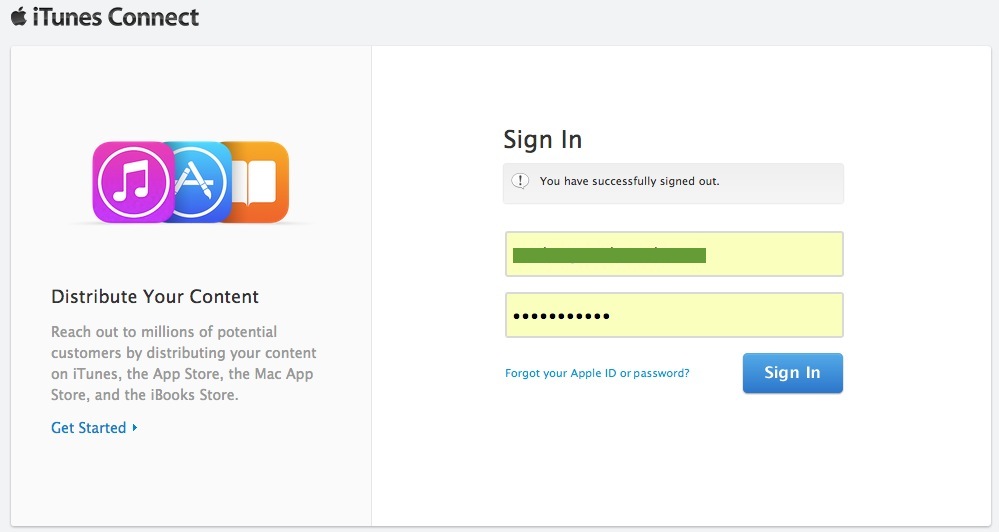
![]() Now, clicking the iTunes Connect link in above screen, will display this screen in your browser. Enter your Apple ID and password, then click Sign in.
Now, clicking the iTunes Connect link in above screen, will display this screen in your browser. Enter your Apple ID and password, then click Sign in.
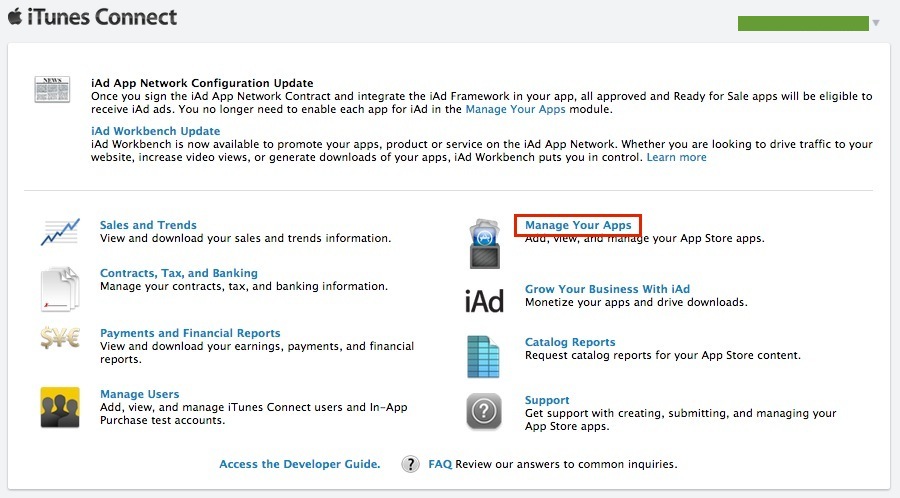
![]() This screen will appear in your browser. Bookmark it as well.
This screen will appear in your browser. Bookmark it as well.
https://itunesconnect.apple.com/WebObjects/iTunesConnect.woa/wo/2.0
Add your Apple ID on your Mac’s Keychains folder
Keychain Access is a Mac OS application for managing a wide variety of items on your Mac-including passwords for email, websites, servers, network shares, Wi-Fi networks, and encrypted disk images. Keychain can also store secure notes, private keys, and certificates. On your Mac, the Keychain Access application is located in the Applications/Utilities folder on your Mac. You can use Spotlight to locate and launch it.

On your Mac, keychain files are stored in this folder:
/Users/yourname/Library/Keychains
Now here are the steps to add your iOS Developer Apple ID on your Mac’s keychains folder.
![]() Launch Xcode and choose Xcode > Preferences.
Launch Xcode and choose Xcode > Preferences.
![]() Click Accounts at the top of the window.
Click Accounts at the top of the window.
![]() Click the Add button (+) in the lower-left corner.
Click the Add button (+) in the lower-left corner.
![]() Choose Add Apple ID from the pop-up menu.
Choose Add Apple ID from the pop-up menu.

![]() In this dialogue, enter your iOS Developer Program’s Apple ID and password, and click Add.
In this dialogue, enter your iOS Developer Program’s Apple ID and password, and click Add.

Once you click the Add button, Xcode will list your iOS Developer member account in the Preferences window like this.

From here on, Xcode will use your Apple ID credentials to sign in to the iOS Dev member center and iTunes Connect on your behalf. Occasionally, you will sign in to the iOS Dev member center and iTunes Connect to perform tasks yourself.
Create two signing identities in Xcode
Ok, you’ve added your Apple ID and Password in your Mac’s keychains. What you have to do now, is create an iOS Development Signing Identity and an iOS Distribution Signing identity. You can create them in the Provisioning Portal or in Xcode. Before you begin, make sure you have these items:
✓ An iPad or iPhone device
✓ A cable for connect the device to your computer
An iOS Development Signing Identity enables you to install and run any iOS app on the connected development device (iPod Touch, iPhone, iPad, iPad Mini). An iOS Distribution Signing Identity enables you to publish your iOS app on the App Store.
![]() In Xcode’s Preferences window, make sure the Accounts tab is selected. Next, click the View Details… button.
In Xcode’s Preferences window, make sure the Accounts tab is selected. Next, click the View Details… button.
![]() Click the Add button (+) and select iOS Development from the pop-up menu. Xcode will then sign in to the Developer Portal, create an iOS Developer Certificate then list it in the Signing Identities panel-see image below.
Click the Add button (+) and select iOS Development from the pop-up menu. Xcode will then sign in to the Developer Portal, create an iOS Developer Certificate then list it in the Signing Identities panel-see image below.

![]() Repeat above step to create an iOS Distribution Signing Identity. Click the Done button, then close the Preferences window.
Repeat above step to create an iOS Distribution Signing Identity. Click the Done button, then close the Preferences window.
In addition to creating above signing identities in the Provisioning Portal, Xcode also created a Wildcard App ID. It is tied to the signing identities and the provisioning profile you will create in the next section.
Create a Development Provisioning Profile in Xcode
What you want to do now is, have Xcode create an iSO Development Provisioning Profile in the Provisioning Portal for the Wildcard App ID and singing identities it created in the portal for you. Next, we want Xcode to download the profile and list it in the Account window’s Provisioning Profiles panel.
An iOS Development Provisioning Profile contains information about you, one or more devices, and an App ID (Wildcard or Explicit). Further more, the profile is required for running your apps on your registered iOS (iPhone, iPod Touch, iPad, or iPad Mini) device.
![]() Open the Accounts tab of Xcode’s Preferences window. (Xcode | Preferences…). Select your iOS Developer Program Apple ID from the list and click View Details.
Open the Accounts tab of Xcode’s Preferences window. (Xcode | Preferences…). Select your iOS Developer Program Apple ID from the list and click View Details.
![]() Click the refresh button in the lower-left corner of the sheet that appears.
Click the refresh button in the lower-left corner of the sheet that appears.

Xcode will create and download an iOS Developer Provisioning Profile at the Provisioning Portal, download and list it in above sheet’s Provisioning Profiles list. It is the item highlighted in blue, in above image.
![]() Click the Done button to close the sheet, then close the Preferences window.
Click the Done button to close the sheet, then close the Preferences window.
Register a device with the Provisioning Portal
So you created two Signing Identities and a Development Provisioning Profile in Xcode. The next step is to register your device with the Provisioning Portal so you can install and run apps you’ve created on it. This process is also known as, provisioning your device for development. You can provision up to 100 devices within the membership year.
![]() Use your device’s cable to connect it to your Mac. This process automatically launch Xcode’s Organizer window (Window | Organizer). Click the Devices tab, and select your device name from the DEVICES section.
Use your device’s cable to connect it to your Mac. This process automatically launch Xcode’s Organizer window (Window | Organizer). Click the Devices tab, and select your device name from the DEVICES section.
![]() In the right hand panel, click the “Use for Development” button. If you don’t see that button, then click the “Add to Member Center” button located at the bottom of the window.
In the right hand panel, click the “Use for Development” button. If you don’t see that button, then click the “Add to Member Center” button located at the bottom of the window.
![]() Select the checkbox next to your account name, and click the Choose button. When you see the green dot beside your device name, it means Xcode have successfully provisioned your device and it is safe to disconnect it from your computer.
Select the checkbox next to your account name, and click the Choose button. When you see the green dot beside your device name, it means Xcode have successfully provisioned your device and it is safe to disconnect it from your computer.

If you want to provision another device, then repeat above steps.
Run an app on the registered device
Ok, you’ve provisioned a device for development. Now, you are ready to run an app on it.
![]() Connect a provisioned device to your Mac. If your device has a passcode, enter it now to unlock it.
Connect a provisioned device to your Mac. If your device has a passcode, enter it now to unlock it.
![]() Create a new Xcode project or launch one you’ve already created. In my case, I launched the iCarLocator app in Xcode.
Create a new Xcode project or launch one you’ve already created. In my case, I launched the iCarLocator app in Xcode.
![]() Select your device name from Xcode’s Scheme menu.
Select your device name from Xcode’s Scheme menu.

![]() Click the Run button and in a few seconds, your app will launch on your device.
Click the Run button and in a few seconds, your app will launch on your device.
Congratulations! Your device is provisioned and you can run any app you’ve created on it.
 That’s the end of part 1 of the tutorial. Take a 15 minutes break before reading part 2 of the tutorial.