
Last week you created a iOS application, added a Search Bar and Collection View on the DrinkRecipesViewController scene. You entered code in the scene’s class files to display items in the Collection View Cells like this:
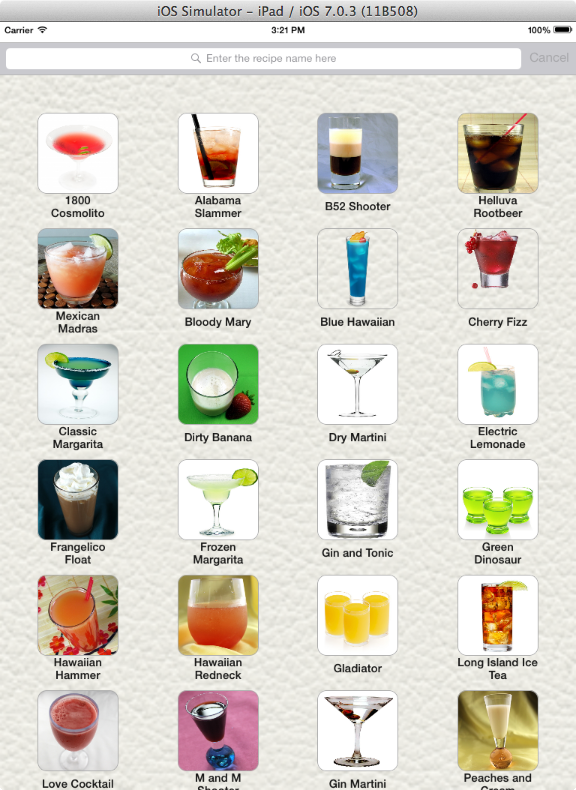 |
| Figure 1: The Drink Recipes View Controller screen in the iPad Simulator |
Our Objectives
Today we have to implement new system tasks shown in the table below, in the DrinkRecipesViewController class files.

As you can see in above table, we have to implement four set of system tasks in the DrinkRecipesViewController class files. Before doing that, we have to do the following:
- Create and configure a new scene in the storyboard file. It will serve as the Recipe Detail View Controller scene.
- Add a UIViewController class in the project, then connect it to the new scene.
- Create an unwind segue that connect the Drink Recipes scene’s Collection View Cell to the Recipe Detail scene.
- Create an unwind segue for the Recipe Detail scene’s Done button. It will transition the user back to the Drink Recipes scene.
Create and Configure The Recipe Detail Scene
Start by dragging a View Controller from the object library and drop it on the right side of the Drink Recipes View Controller scene. Next, use these images as a guide to add an Objective-C class file in the project. In step 4, enter “RecipeDetailViewController” in the Class box. For the Subclass of box, select “UIViewController” before clicking the Next button.

Now, return to the storyboard file and use the Identity inspector to connect the View Controller scene to the RecipeDetailViewController class, like this:

Ok, I want you to drag a Button control from the Object library and drop it at the bottom of the Recipe Details View Controller scene. Double-click it and enter “Done”, without quotes of course. Set its Font attribute to Verdana 17. You should center the button on the scene as well. Continue designing the Recipe Detail View Controller scene by adding controls shown in this image.

Create an Unwind Segue For The Done Button
Now, when the user tap the RecipeDetail page’s “Done” button, we want the app to return the user back to the Drink Recipes screen. In order to to do that, we’ll have to implement an unwindSegue in the DrinkRecipesViewController.m file, then connect it to the Recipe Detail View Controller scene’s Done.
Here’s the unwind segue method to add in the DrinkRecipesViewController.m file.
- (IBAction)unwindSegue:(UIStoryboardSegue *)segue
{
  if([segue.identifier isEqualToString:@"returnToDrinkRecipePage"]) {
  }
}
Now, here are the steps to connect the unwind segue to the the Done button in Interface Builder.
- In the storyboard file, click the Recipe Detail View Controller scene’s Dock.
- Control-drag from the Done button to the Exit icon.
- Select “unwindSegue:” from the segue list that pop-up.
- Click the unwind segue Xcode created in the Document Outline; then in the Attribute Inspector, set its Identity attribute to “returnToDrinkRecipesPage”.
The key steps in performing an unwind segue is to give it a name, via Interface Builder, and reference it in the unwind segue method, via an if statement.
Create a Segue for The Collection View Cell
What we have to do now is, create a segue that connect the the Drink Recipes View Controller scene’s Collection View Cell to the Recipe Detail View Controller scene; so when you click a recipe icon in the Drink Recipes screen, the app will display the Recipe Detail screen. Here are the steps to create the segue.
- Expand the Document Outline, then expand the Drink Recipes View Controller Scene and the Recipe Detail View Controller Scene.
- Control-drag from the Drink Recipes View Controller Scene’s “Recipe Cell – Cell” to the Recipe Detail View Controller. From the pop-up menu, select “modal”.
- Click the segue Xcode created in the Document Outline. Then in the Attributes Inspector, enter “showRecipeDetailPage” in the Identifier box.
The RecipeDetailViewController Class Code
In the DrinkRecipesViewController.m file’s prepareForeSegue method, this statement passed the recipeSelectedArray we initialized in the Collection View’s didSelectItemAtIndexPath: method, to the RecipeDetailViewController’s recipeSelectedArray.
destinationViewController.recipeSelectedArray = self.recipeSelectedArray;
Now, we’ll have to add code in the RecipeDetailViewController class files to display elements of its recipeSelectedArray in the view’s controls.
Start by adding this code in the RecipeDetailViewController.h file.
#import <UIKit/UIKit.h>

@interface RecipeDetailViewController : UIViewController

@property (strong, nonatomic) NSArray *recipeSelectedArray;
@property (weak, nonatomic) IBOutlet UIImageView *drinkImage;
@property (weak, nonatomic) IBOutlet UILabel *drinkName;
@property (weak, nonatomic) IBOutlet UILabel *servings;
@property (weak, nonatomic) IBOutlet UITextView *ingredients;
@property (weak, nonatomic) IBOutlet UITextView *instructions;

-(IBAction)done:(id) sender;
Switch over to the implementation file and add these statements in the viewDidLoad method.
- (void)viewDidLoad
{
  [super viewDidLoad];
  // Fetch the image from the server and assign it to the imageFromServer variable
  NSString *imageUrl = self.recipeSelectedArray[1];
  UIImage *imageFromServer = [UIImage imageWithData:
  [NSData dataWithContentsOfURL:
  [NSURL URLWithString:imageUrl]]];

  // Populate the views controls with the RecipeSelectedRecipeArray's elements
  self.drinkImage.image = imageFromServer;
  self.drinkName.text = self.recipeSelectedArray[0];
  self.servings.text = [@"Servings " stringByAppendingString:self.recipeSelectedArray[2]];
  self.ingredients.text = self.recipeSelectedArray[3];
  self.instructions.text = self.recipeSelectedArray[4];
}
Here is the final set of methods to add in add in the file.
-(IBAction)done:(id) sender
{
  // This statement return the user back to the DrinkRecipes page
  [self performSegueWithIdentifier:@"returnToDrinkRecipesPage" sender:sender];
}

// Force the device to display in portrait orientation
- (NSUInteger)supportedInterfaceOrientations
{
  return UIInterfaceOrientationMaskPortrait;
}
Connect The View’s Controls
Go to interface Builder and connect the IBOutlet properties you declared in the RecipeDetailViewController.h file for view’s controls. We’ve already connected the Done: method via the unwind segue.
Test The Recipe Detail View
Go ahead and run the Recipe Detail view. Once the Drink Recipes view is loading in the simulator, click a Collection View Cell. If you see the Recipe Detail view in the the simulator, as shown in the image below, then that means the segue worked and we’ve successfully connected the view’s outlet properties to there respective control.

Click the Done button. If the app transition you back to the Drink Recipes screen, that means the unwind segue connection we made for the button worked.
Implementing The System Tasks
Now that’ we’ve created the Recipe Detail View Controller scene and coded its class files, we are ready to add more code in the DrinkRecipesViewController.m file to implement the system tasks, identified in above table.
Start by entering this code in the file, which implement the deleteButton’s method.
#pragma mark - action method for the red delete button

- (void)delete:(UIButton *)sender
{
  NSIndexPath *indexPath = [self.collectionView indexPathForCell:(RecipeCell *)sender.superview.superview];

  if (self.isSearchOn) {
    [self.searchResults removeObjectAtIndex:indexPath.row];
  } else {
    [self.drinkList removeObjectAtIndex:indexPath.row];
  }
  [self.collectionView deleteItemsAtIndexPaths:[NSArray arrayWithObject:indexPath]];
  [self.collectionView reloadData];
}
By the way, the delete: method is called in the Collection View’s cellForItemAtIndexPath: method like this:
[_icon.deleteButton addTarget:self action:@selector(delete:) forControlEvents:UIControlEventTouchUpInside];
Next, modify line 06 in the DrinkRecicpesViewController.h file to this:
@interface DrinkRecipesViewController : UIViewController <UIGestureRecognizerDelegate>
The Collection View Gesture Recognizers
We have to set up a long press and tap gesture recognizer for the Collection View. A Gesture recognizer is an object you attach to a view, allowing the view to respond to actions the way a control does. A gesture recognizer interpret a touch to determine whether it correspond to a specific gesture, such as a swipe, pinch, or tap. If a gesture recognizer object recognize its assigned gesture, it sends an action message to a target object. The target object is typically the view’s view controller, which respond to the gesture.
Fundamental Gesture Recognizer Rules
- Your app should respond to gestures only in ways that users expect.
For example, a pinch should zoom in and out whereas a tap should select something. - Only one gesture recognizer can be attached to a view.
Xcode’s Object Library and the UIKit Framework already contain these predefined gesture recognizers you can use in Interface Builder’s or in code.

To use a predefined gesture recognizer in your app, you’ll have to do the follow:
- Create and configure a gesture recognizer.
This step includes assigning a target, action, and optionally assigning gesture-specific attributes (such as the numberOfTapsRequired). - Attach the gesture recognizer to a view.
- Implement the action method that handles the gesture.
The Application Long Press Gesture Recognizer
We’ll setup a long press gestureRecognizer and action method for the Collection View. The gesture recognizer will put the Collection View in delete mode when you long-click (long press) a Collection View Cell as shown in this image.

The Application Tap Gesture Recognizer
We’ll setup a tap gesture recognizer and an action method for the Collection View. The gesture recognizer will take the Collection View out of delete mode when you click (tap) the Collection View’s background. Here’s what the Collection View will look like when it is no longer in delete mode.

Create The Long Press GestureRecognizer in Interface Builder
There are two ways to create a gesture recognizer object: in code or in Interface Builder. The second method is faster and easier. We’ll us use it to create our long press recognizer for the Collection View.
The first thing we have to do is declare and implement an action method for the Long Press Gesture Recognizer object. Add this method declaration in the DrinksRecipesViewController.h file.
- (void)activateDeletionMode:(UILongPressGestureRecognizer *)gr
Then implement it in the DrinkRecipesViewController.m
#pragma mark - gesture-recognition action methods

- (IBAction)activateDeletionMode:(UILongPressGestureRecognizer *)gr
{
  self.shouldAnimate = YES;
  _icon.deleteButton.hidden = NO;

 [self.collectionView.visibleCells makeObjectsPerformSelector:@selector(startShakingIcons)];
 [self.collectionView reloadItemsAtIndexPaths:self.collectionView.indexPathsForVisibleItems];
}
The second thing we have to do is go to the storyboard and attach a Long Press Gesture Recognizer to the Collection View.
1. Go to the storyboard, then expand the Drink Recipes View Controller menu. Also, click the Connections Inspector icon to show it.

2. Drag a Long Press Gesture Recognizer from the Object Library and drop it on the Collection View object that’s in the Document Outline. Notice that when you drop the Long Press Gesture recognizer on the Collection View, it becomes a child of the Drink Recipes View Controller rather than the Collection View.
You can verify that the gesture recognizer is connected to the Collection View by selecting it in the Document Outline, then look at the Connections Inspector, if the Long Press Gesture Recognizer is in the gestureRecognizers collection-see pink box in the image below, then you’ve successfully connect the gesture recognizer to its view.
 |
| Figure 2: Long Press Gesture Recognizer connections |
3. Select the Long Press Gesture Recognizer object in the Document Outline. In the Connections Inspector, control-drag from the delegate circle to the Drink Recipes View Controller that’s in the Document Outline. Release your mouse when the Recipes View Controller is highlighted. Take a look at the green box in the image above to see what the connection should look like.
4. In the Connections Inspector, control-drag from the selector circle to the Drink Recipes View Controller, release your mouse when it is highlighted, then select activeDeletionMode: from the popup. The yellow box in the image above shows what the connection should look like.
Test the Long Press Gesture Method’s Code
Run the application and long click on a Collection View Cell. Awesome! The view is in delete mode and the Collection View Cells are shaking in fear of deletion. Go ahead and click the red delete to delete one or all Collection View Cells. While in delete mode, you can even access the Recipe Detail screen by simply tapping a Collection View Cell.
 |
| Figure 3: Long Press Gesture Recognizer method in action |
Ok, now we have to create a tap gesture recognizer to take the Collection View out of delete mode. So terminate the application and return to the storyboard.
Create The Tap GestureRecognizer in Interface Builder
Drag a Tap Gesture Recognizer from the Object Library and drop it on the Collection View, in the Document Line. Switch over to the DrinkRecipesViewController.m file and implement this action method for the Tap Gesture Recognizer.
- (IBAction)endDeletionMode:(UITapGestureRecognizer *)gr
{
  self.shouldAnimate = NO;
  _icon.deleteButton.hidden = YES;
  [self.collectionView.visibleCells makeObjectsPerformSelector:@selector(stopShakingIcons)];
}
Return to the storyboard and connect the method by control-drag from the selector circle to the Drink Recipes View Controller in the Document Outline. A popup will appear – select endDeletionMode:.
Next, connect the delegate to the Drink Recipes View Controller by control-drag from the delegate circle to the Drink Recipes View Controller in the Document Outline. When you’re done, the Connections Inspector should look like this:
 |
| Figure 4: Tap Gesture Recognizer connections |
Test The Tap Gesture Recognizer Method’s Code
Run the application again, then long click a Collection Cell like you did before to put the Collection View in delete mode. Awesome! the Collection View’s long press gesture recognizer still work. Click the Collection View’s background to take the Collection View out of delete mode. As you can see the long press and tap gesture recognizer we attached to the Collection View work as intended; however the Collection View Cell’s segue doesn’t work any more. That’s because we broke this fundamental Gesture Recognizer rule:
Only one gesture recognizer can be attached to a view.
We’ve attach two gesture recognizers to the Collection View in Interface Builder; a long press gesture recognizer and a tap gesture recognizer. By having two gesture recognizers attach to the Collection View creates this problem:
Our tap gesture recognizer override the tap gesture recognizer the segue attached to the Collection View.
To fix this problem, we have to tell the app to ignore the tap gesture recognizer we attached to the Collection View only when the user touch the Collection View and the touch is a tap gesture; otherwise, execute the tap gesture the segue attached to the Collection View. By, the way the segue’s tap gesture’s job is to transition you to the Recipe Detail screen.
Now, the UIGestureRecognizerDelegate protocol have a method we can use to fix our problem. It is called shouldReceiveTouch:. Here’s the code to implement it in the DrinkRecipesViewController.m file.
- (BOOL)gestureRecognizer:(UIGestureRecognizer *)gestureRecognizer shouldReceiveTouch:(UITouch *)touch
{
  CGPoint touchPoint = [touch locationInView:self.collectionView];

  NSIndexPath *indexPath = [self.collectionView indexPathForItemAtPoint:touchPoint];

  if (indexPath && [gestureRecognizer isKindOfClass:[UITapGestureRecognizer class]]) {
    return NO;
  }
  return YES;
}
The first statement assign the location where the user touch in the Collection View to a variable. The second statement assign the indexPath of the Collection View Cell the user tapped to a variable. The if() statement is asking this question:
Did the user touch a Collection View Cell and is the touch a tap gesture?
If the user did touch a Collection View Cell and it’s a tap gesture; then the single statement with the if() block ignore the tap gesture we attached to the Collection View. The return statement outside the if() block goes ahead and handle the tap gesture the segue attached to the Collection View.
Run The Application
Ok, take the app for a spine. Once the Drink Recipes view is loaded in the simulator, click a Collection View Cell. As you can see, the segue you setup for the Collection View works now.
Ok, click the Done button, then long-press a Collection View Cell or the Collection View’s background. As you can see, the Collection View goes into delete mode. At this point you can delete Collection View Cells and access the the Recipe Detail screen by simply tapping a Collection View Cell. Go ahead and click the Collection View’s background to take it out of delete mode.
Awesome! We’ve implemented all systems tasks for the Drink Recipes View Controller screen and the Recipe Detail View Controller screen. All that’s left is to add code in the DrinkRecipesViewController class files to make the Search Bar work. We’ll do that next week. Until then, happy coding! 🙂