
Today you will enter code in the Nifty-IAP app’s ProductViewController class to implement In-App Purchase task 4-7. They pretty much enable the app user to purchase Non-Consumable products (music videos) within the Nifty app store and watch them.

Remember, the Nifty app store is the tableView that’s on the ProductView and it look like this now:

Before, you get started, I assumed you read part 1, part 2, part 3, and part 4 of the tutorial. Also, I assumed you created a new branch called part5 from the current branch; which is called part4.
Task 4 to 7
Here is a diagram and description of the In-App Purchase tasks you will implement in the ProductViewController today. As you can see, the user is the one who initiate the the In-App Purchase task by requesting to purchase a product. How? By tapping a Buy Now button in the Nifty app store.

- The user request to purchase a product
- The Nifty app store send the product request to StoreKit
- StoreKit send the product request to the App Store
- The App Store charge the user account (see not below)
- The App Store send a payment transaction to StoreKit
- StoreKit pass the payment transaction to the Nifty app store
- The Nifty app store deliver the purchased product and update its UI
Note: Since the user is in making a purchase in sandbox environment, her account is not charged.
Now, click the ProductViewController.swift file to load it in Xcode’s standard editor. Next, locate the buyNowButtonTapped() function and remove the NSLog() statement and add these two statements:
func buyNowButtonTapped(sender: UIButton) {
  let paymentRequest = SKPayment(product: productsArray[sender.tag])
  SKPaymentQueue.defaultQueue().addPayment(paymentRequest)
}
The first statement created a paymentRequest object. You pass it the product the user wants to purchase. The second statement added the paymentRequest to the SKPaymentQueue. Doing so cause the Nifty app store to send a paymentRequest for the product the user selected in the Nifty app store, to StoreKit. StoreKit in turn pass the request to the App Store for processing.
Next, enter this code in the empty updateTransactions() function.
func paymentQueue(queue: SKPaymentQueue, updatedTransactions transactions: [SKPaymentTransaction]) {
    for transaction in transactions {
        switch transaction.transactionState {

        case SKPaymentTransactionState.Purchased:
            print("Transaction Approved")
            print("The product identifier of the approved product is \(transaction.payment.productIdentifier)")
            deliverProduct(transaction)
            SKPaymentQueue.defaultQueue().finishTransaction(transaction)
        case SKPaymentTransactionState.Failed:
            print("Transaction Failed")
            SKPaymentQueue.defaultQueue().finishTransaction(transaction)
        default:
            break
        }
    }
}
As you cans see, a user function is called in the updatedTransactions() function. Here is the code to implement it in the ProductViewController class.
func deliverProduct(transaction:SKPaymentTransaction) {
    if transaction.payment.productIdentifier == "net.theapplady.Nifty_Video2" {
        purchasedProductIdentifiers.insert("net.theapplady.Nifty_Video2")
        tableView.reloadRowsAtIndexPaths([NSIndexPath(forRow: 0, inSection: 0)], withRowAnimation: .Fade)

    } else if transaction.payment.productIdentifier == "net.theapplady.Nifty_Video3" {
        purchasedProductIdentifiers.insert("net.theapplady.Nifty_Video3")
        tableView.reloadRowsAtIndexPaths([NSIndexPath(forRow: 1, inSection: 0)], withRowAnimation: .Fade)

    } else if transaction.payment.productIdentifier == "net.theapplady.Nifty_Video4" {
        purchasedProductIdentifiers.insert("net.theapplady.Nifty_Video4")
        tableView.reloadRowsAtIndexPaths([NSIndexPath(forRow: 2, inSection: 0)], withRowAnimation: .Fade)

    } else if transaction.payment.productIdentifier == "net.theapplady.Nifty_video1" {
        purchasedProductIdentifiers.insert("net.theapplady.Nifty_video1")
        tableView.reloadRowsAtIndexPaths([NSIndexPath(forRow: 3, inSection: 0)], withRowAnimation: .Fade)
    }
}
That’s pretty much all the code you have to put in the ProductViewController class; which implement task 4-7 that’s on the In-App Purchase card.
Analysis of The updateTransactions() Function
First of all the updatedTransactions() function is a delegate of the SKPaymentTransactionObserve protocol. Since the ProductViewController class is an observer of In-App Purchase transactions, the updatedTransactions() function tells its observer that a paymentRequest transaction occurred. Further more the updatedTransactions() process the transaction it received by examining the transaction’s transactionsState property. As you can see, a switch statement was used in the updatedTransactions() function to examine the transaction’s transactionsState property-state for short.
If the state is Purchased; then code in the case block print two messages in Xcode’s console. By the way, they are for debug purpose only. You can delete/comment them out later on. The next statement calls the user defined function, deliverProduct(). The last statement clean up after the purchase transaction. By the way, this is step 7 on the In-App Purchased card.
If the state is Failed; then code in the case block print a message in Xcode’s console. Again, this statement is only for debug purpose, you can delete/comment it out later on. The next statement clean up after the purchase transaction. By the way, code in the SKPaymentTransactionState case is only executed when the user change his/her mind about purchasing a particular product. As for the default case, is required and it doe nothing.
Analysis of The deliverProduct() Function
This user defined is called in the updatedTransactions() function. It job is to well, deliver the product the user purchase. In other words, the deliverProduct() function permanently unlock the music video the user purchase.
Code you entered in the deliverProduct() function’s if-else if statements compare the transaction payment productIdentifier’s string to a product id. If a match is found, insert the product id of the product the user purchased in the purchasedProductIdentifiers set. Refresh the appropriate tableView cell so the checkmark appear in the cell’s accessoryView, instead of the Buy Now button. This last step is very important; because it visually let the user know that he/she successfully purchased a product (a music video) and that it is permanently unlocked.
Testing In-App Purchase on Your iOS Device
Code you entered in the ProductViewController class implement the In-App Purchase capability in the Nifty app store.
| Before you run the app on your iPhone device, you must log out from your regular App Store account. This prevents it from automatically being used and charged during the In-App Purchase testing process. Do not sign in with your sandbox test account on your device. |
Run the app on your iPhone device and you will see the standard Apple Sign In alert view shown in Figure A below. Tap the Using Existing Apple ID button. On the next Apple alert view that appear on your screen, you are asked to sign in to iTunes Store. Go ahead and use your sandbox test account to sign in and tap the OK button.
 Figure A |
 Figure B |
When you see the Nifty app store, shown in Figure C below, tap the third Buy Now button. By doing that, you are telling the Nifty app store you want to purchase the Skyfall video. You are then asked to confirm the purchase-see Figure D below. Tap the Buy button. No financial transaction takes place, but a receipt is generated for a successful transaction.
|
Figure C |
 Figure D |
You will see Apple’s Thank You alert view. Also, the Nifty app store update the third tableView cell’s accessoryView by displaying a checkmark.
 Figure E |
 Figure F |
Tap the tableView cell of the product you just purchased. The Nifty-IAP app respond by playing the Skyfall video in the VideoView.

Lock Un-purchased Products
As you saw, code you entered in the ProductViewController class work just fine; however, there’s one problem. Products the user haven’t purchased are unlock. To fix that problem, add code shown below in the shouldPerformSegueWithIdentifier() function. When the user tap a cell in tableView, the shouldPerformSegueWithIdentifier() is called before the prepareForSegue() function. As you already know, the prepareForeSegue() function transition the user to another view; in our case, it is the VideoPlayer view.
override func shouldPerformSegueWithIdentifier(identifier: String, sender: AnyObject?) -> Bool {
    if identifier == "showVideoPlayer" {
        var shouldTransition: Bool = false

        if let indexPath = self.tableView.indexPathForSelectedRow {
            if indexPath.row == 3 && purchasedProductIdentifiers.contains("net.theapplady.Nifty_video1") == true {
                shouldTransition = true

            } else if indexPath.row == 0 && purchasedProductIdentifiers.contains("net.theapplady.Nifty_Video2") == true  {
                shouldTransition = true

            } else if indexPath.row == 1 && purchasedProductIdentifiers.contains("net.theapplady.Nifty_Video3") == true  {
                shouldTransition = true

            } else if indexPath.row == 2 && purchasedProductIdentifiers.contains("net.theapplady.Nifty_Video4") == true  {
                shouldTransition = true
            }
        }
        return shouldTransition
    }

    return true
}
Code you entered in the shouldPerformSegueWithIdentifier() function basically lock un-purchased products. How? By evaluating a compound “and” (&&) expressions in a series of if statements. If one of them evaluates to true; the shouldTransition variable; which is declared and initialized on line 03, is set to true. Now, since the user successfully purchased the third product in the Nifty app store. The last else if statement evaluates to true; thus unlocking only the Skyfall product.
Every time you run the Nifty-IAP app on your iPhone device, the Buy Now will appear in the tableView cell’s accessaryView of the product you previously purchased. You have to go through the In-App Purchase process again; however, the App Store will not charge your account again and you’ll see this Apple alert view on your device’s screen. Tap the OK button to dismiss it and you will see the checkmark in the third tableView cell’s accessaryView.

The last thing I want you to do now is purchase the Shake it music video and the Hello music video. Once you done that, the Nifty app store will look like this now. Because there are checkmarks in the last three tableView cells’ accessaryView, you can watch those music videos by simply tapping the appropriate tableView cell.

That’s all for today; so terminate the app. Next, use Xcode’s Source Control/Commit command to commit changes you made to the Git repository.
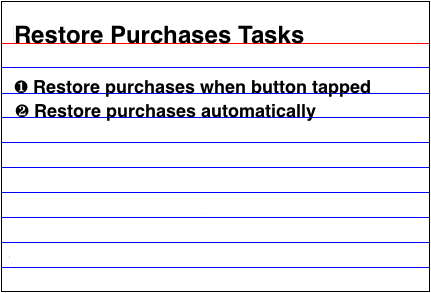
Next week, I bring you the last part of the In-App Purchase How To tutorial. You will enter code in the ProductViewController class to implement tasks that are on this card.